 How to install Xerus Quirky
Xerus is provided as a 8GB USB Flash stick image, or for an SD-card. This file may be written to an 8GB or greater Flash stick. In the latter case, at first bootup there will be an offer to increase the filesystem to fill the drive. Do not try and use a 4GB or smaller drive!
The image file is named like this: xerus-8.1.6-amd64-8gb.img.gz
This is an image of the entire Flash stick, gzip compressed -- the ".img" identifies it as an image-file, and ".gz" identifies it as compressed.
For those who want an ISO file, it is provided on the download site. It is a live-CD, that can be burnt to a CD or written to a Flash stick.
The instructions below are for the 8GB image file...
Linux
If you are running Linux and are familiar with the commandline, here is how to write the compressed image file to a Flash stick.The file is compressed, using gzip compression. To write to the SD-card, running Linux, do this:
- Make sure the card is inserted but not mounted.
- Be absolutely certain that you know the correct drive name (ex: /dev/sdb)!
- Execute this in a terminal, in this example /dev/sdb is the SD-card:
# md5sum xerus-8.1.6-amd64-8gb.img.gz
# gunzip --stdout xerus-8.1.6-amd64-8gb.img.gz | dd of=/dev/sdb bs=4M
# sync
The "|" is a pipe operation, that feeds the uncompressed output from the gunzip utility, into the "dd" utility which writes the data to the drive. The final "sync" operation flushes the tail-end of the data to the drive, ensuring that you are then able to unplug the drive.
If you have any uncertainty about using the commandline in Linux, then don't. You need to be absolutely certain that you are writing to the correct drive, that it is unmounted, and you haven't typed spaces in the wrong place. If in doubt, use the Windows tool.
Windows
There are various tools for writing a compressed image file to a Flash stick. The one that I have tested is USB Image Tool, which is free.USB Image Tool website: http://www.alexpage.de/usb-image-tool/
Download: http://www.alexpage.de/usb-image-tool/download/
I have also provided it at my host site:
http://distro.ibiblio.org/quirky/quirky6/amd64/releases/windows-apps/usbit.zip
Before launching into a description of how to use USB Image Tool. you should have downloaded SlaQ, file "slaq-8.1.6-amd64-8gb.img.gz". It is a very good idea to check that it was properly downloaded. There is a tool for doing this:
http://www.pc-tools.net/win32/md5sums/
I have also hosted it here:
http://distro.ibiblio.org/quirky/quirky6/amd64/releases/windows-apps/md5sums-1.2.zip
Unzip it, and extract "md5sums.exe" (usually achieved by right-click, then choose to extract contents). The usage instructions explain that if you drag "slaq-8.1.6-amd64-8gb.img.gz" on top of "md5sums.exe", it will display the md5sum hash-code. You can check this against the content of the online "md5sums.txt" file, to verify that the file was downloaded correctly.
This is optional, but usually a good thing to do.
USB Image Tool does not have an installer, it is just a zip file that you extract the files from wherever you want them. That is, download, to say, the "Download" folder, then copy "usbit.zip" wherever you want it, then right-click on it and choose to extract the contents. When you do so, you will see these files:
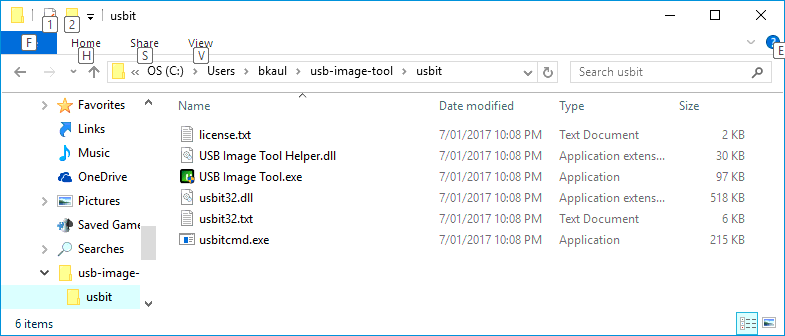
The one that you need to run is "USB Image Tool.exe" -- right-click on it and choose "Run as administrator".
If your USB Flash stick is already plugged in, you will see it on the left side. Otherwise, plug it in and it should appear. Notice at the top, "Device mode" is selected, this is important:
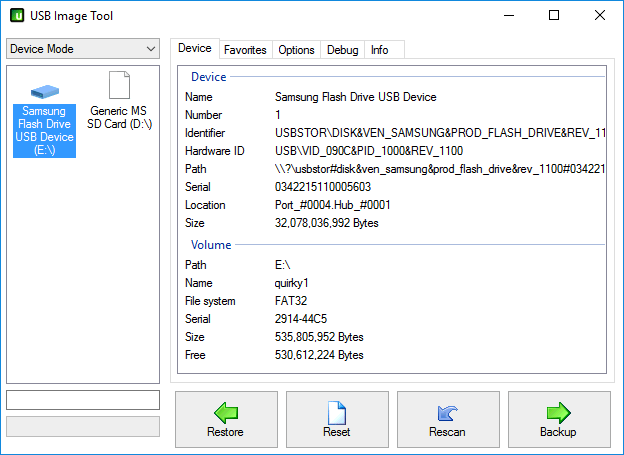
Click on the Flash drive to highlight it, then click the "Restore" button. You should have downloaded the compressed image file beforehand, now choose it:
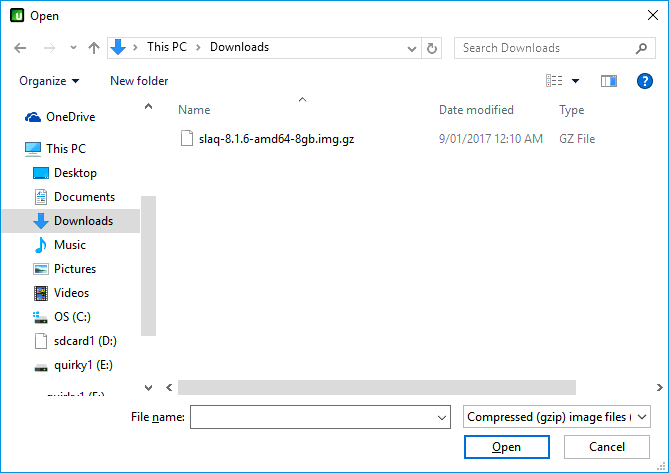
Easy, just highlight "xerus-8.1.6-amd64-8gb.img.gz" (or whichever you have downloaded) then click the "Open" button. Then just watch as the file is uncompressed and written to the drive:

Note that the uncompressed image file is 8GB, but you do not need that much free space on the hard drive. USB Image Tool writes the file immediately to the Flash drive as it is uncompressed (in Linux we refer to this as piping)
One thing to be careful about. Looking at the above snapshot, you might think it reasonable that writing is finished when it reaches "100%". Not so, it actually went to almost "300%" before finishing. So wait until the green bar goes away entirely.
Do not yet unplug the Flash stick! It is now ready to use, however, with Windows you must first select "Safely eject drives" from the tray:
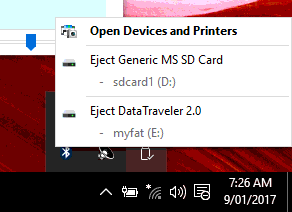
This ensures that Windows has fully flushed everything to the drive. If you just pull out the drive without doing this, it is possible the tail-end of the write operation was not fully written to the drive, even if you have finished and exited from USB Image Tool.
In the example shown above, the Flash drive that I have plugged-in is named "Data Traveler 2.0". I also have an SD-card inserted.
How to boot from the Flash stick
After having written to a Flash stick, it is ready to be used. However, the computer has to be configured to boot (startup) from the Flash stick, rather than its usual internal hard drive.This is a straightforward process, but in the case of modern PCs and laptops with Windows 10, it does involve a few steps.
I have written a separate page explaining how to setup booting on a modern computer:
http://barryk.org/quirky/uefi.htm
One useful bit of information: I have two laptops, both with SD-card slots. However, the laptops cannot be configured to boot from them. Unfortunate, it would be nice to boot Quirky off a SD-card, as it does not stick out the side of the laptop!
Another useful bit of information: not all Flash sticks are the same! Some of them are incredibly slow. Interestingly, I have purchased cheap USB3 sticks recently and tested them -- found that they run essentially at the same speed regardless of whether plugged into USB2 or USB3 sockets, and at about twice the speed of cheap USB2 sticks. My testing is limited, but something to consider when shopping for a Flash stick.
If you like Quirky and want to keep using it on your computer, no problem. However, if you don't like the Flash stick sticking out the side of your laptop, you might want to consider installing Quirky onto the internal hard drive.
There are various ways to install Quirky onto the hard drive, such as the simple technique I have documented here:
http://barryk.org/news/?viewDetailed=00475
...however, I intend to improve these instructions soon, watch my blog: http://barryk.org/news/
Have fun!
Regards,
Barry Kauler
Jan. 13, 2017